Monday, 29 February 2016

Image Transfer, She flies

Eager to play with all the possibilities of image transfer and wanting to use this particularly striking image of a 60's girl with angular haircut; I had several attempts to transfer this image onto a substrate.....I tried the method that was demonstrated by Sara Naumann involving sticky tape....failed....tried transferring, Leandra style with Satin Glaze....failed and finally managed it with inspiration from the latest Guest Designer blog with the doggie by Penny Nuttall.

I prepared the back of a cereal packet by gessoing.
I  printed off my 60's image and laid it face down onto Matte Medium, burnished with a spoon and left it overnight!  Very difficult for me to leave anything overnight...particularly biscuits!

Next, I sprayed the paper with water and carefully rubbed off the backing paper....I found a baby wipe helped because the black ink wanted to spread everywhere.


Next, I sprayed some Distress Stains, Vintage photo, Faded jeans and Hickory Smoke onto my craft sheet, sprayed a little water over them and dipped the surround of my card into them. If anything looked too dark, then I dabbed some kitchen roll over them.


I then used Paperartsy stamp HP1506EZ to complete my work....the butterflies with background straight onto the card and the sentiment and single butterfly onto Kraft card....all stamped with Black Archival. 
Just a little Vintage Photo ink around the edges and a little bit of scribble with Black pen to create a frame. 
Like how she turned out and could play with this image again, maybe using psychedelic colours.....groovy baby!


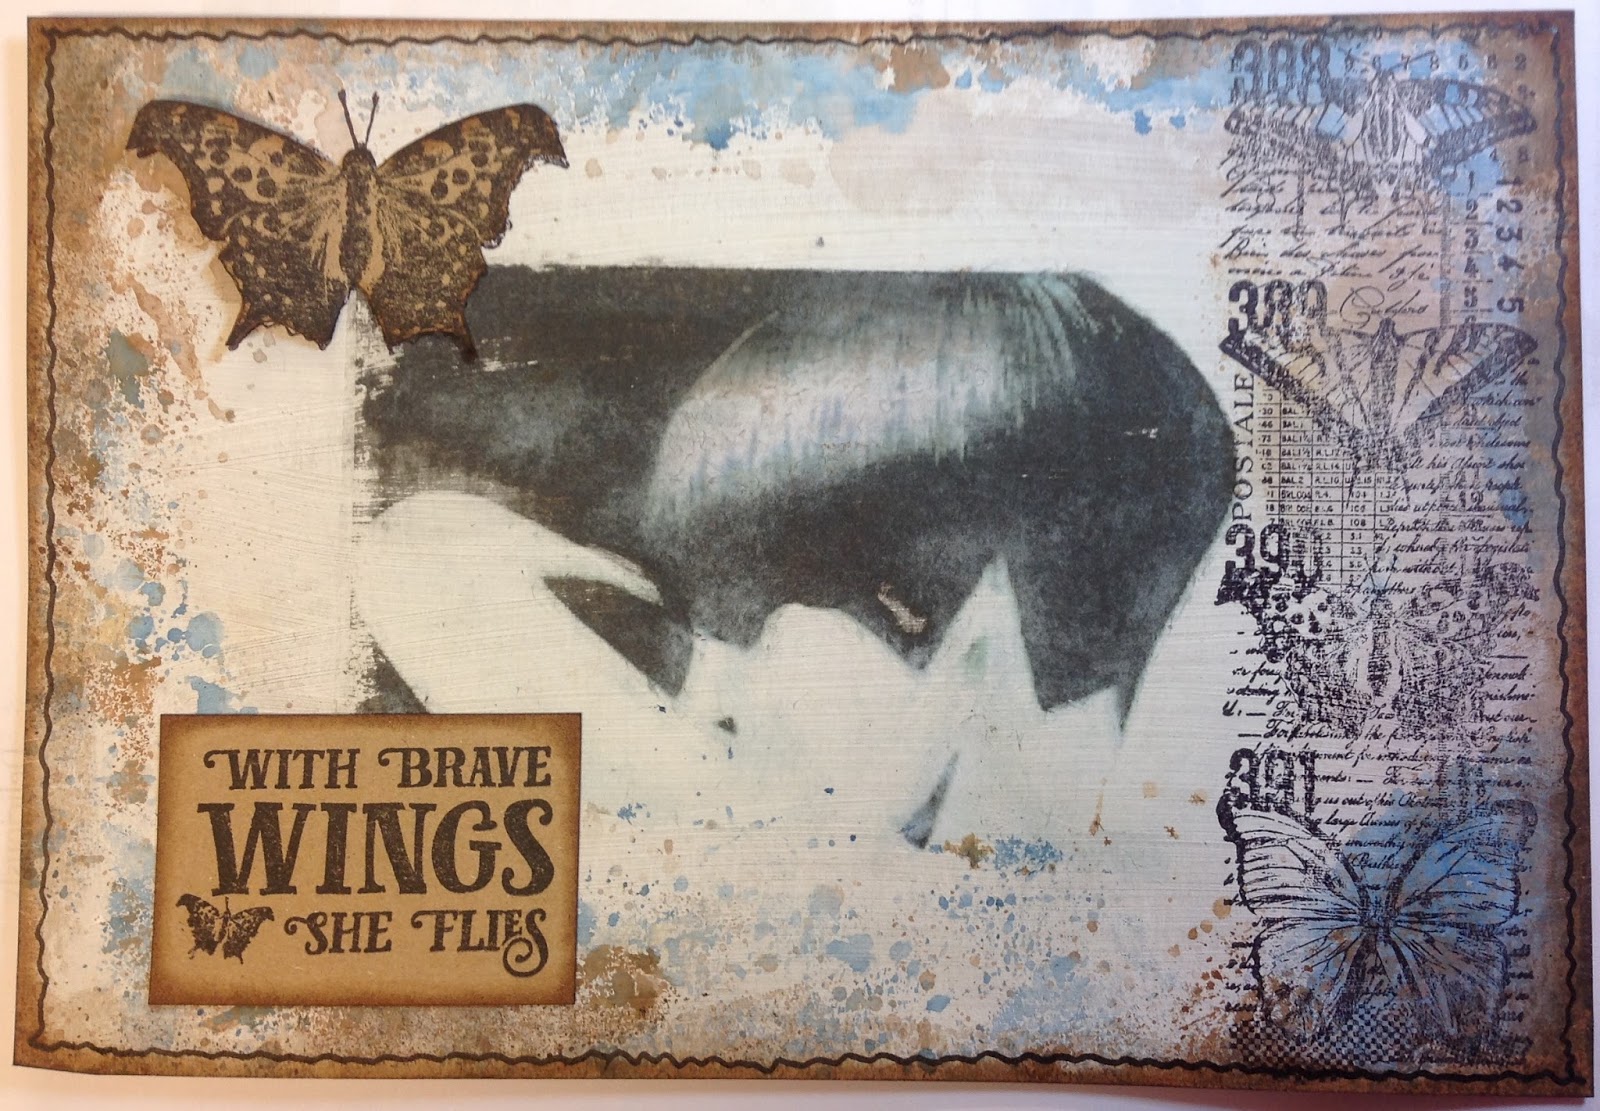
I do hope that you can make out the image of the girl....my hubby couldn't work it out till I showed him!
Am entering this into the PA challenge!


Sunday, 28 February 2016

Face with hat

I watched someones blog video this week which encouraged me to play more with backgrounds.
I started by gluing manuscript, dictionary papers and some stamping bits and bobs that my grandchildren did!

I stamped a few dots and letters with archival ink and filled in all the blanks with Portfolio pastels. Finally, I stamped a PA script stamp with black archival!


So, this was my background.

Next, I drew the outline of the face in profile with my black Stabilo pencil. 
I painted in the face with fresco vintage lace, painted the hat with Baltic blue and painted Toffee for the hair and hat band. I made a [attern for her dress with black and white marks using the side of a paintbrush and added some shading. i finished by adding some contrast to the hair with crayons and painted in her eye and lips!
So, here is face with hat!  Entering her into the Kim Dellow face on friday!


Also, Countryviewcrafts blog is working on backgrounds, so would love to share this on there too!


Wednesday, 24 February 2016

Teasel transfer

What a wealth of ideas were on the PA blog entitled Image Transfer.

Recently, I bought some Photo Fabric, which is paper backed fabric that I can print onto from my inkjet printer.

Also recently, I created a doodle style project over on the Wanderlust course and decided to develop it using the transfer technique.

I started by using the image of the Teasels and printing it onto the fabric, first small and in the original colours and then A4 in grey tones.


I backed the larger image onto Vilene and began to draw over it with my sewing machine....machine embroidery!


Added lots of machine and hand embroidery and then added some seed beads etc from my tiny stash!!


I sewed a frame for my smaller image using Sari silk, added seed beads and sewed it onto my main picture! 


I added lots of buttons....printed a Lin Brown sentiment onto Sari Silk and there it was finished! 
Feel really pleased with it! 


I am entering this into the PA challenge.


Tuesday, 23 February 2016

Profile face

Over on Kim Dellow's "show your face " blog, I was inspired to have a go myself at a face in profile! Just never thought of it before. So, I kept it simple.

I gessoed a page in an old book and stencilled with 3 Paperartsy fresco colours...Elephant, Pewter and White Fire.


Next, I knocked back some of the stencilling with Fresco Chalk, so that the face would not be too obscured!
I found a profile face that I liked and drew her with Black Stabilo pencil, then went over the lines with a watery brush. A scribbled border and was finished. 
I am tempted to add more to it, but decided to let the outline speak for itself.....wish that I had a long neck!


I am entering this onto Kim's faces blog.

Tuesday, 16 February 2016

Crooked Spire

A few days ago, Jo Myhill shared with us a post by the very talented Stephanie Schultz. She is a mixed media artist and includes her own sketches. After watching one of her videos I decided to adapt this to my own style.

I started by gluing some torn mop up paper which has some Paperartsy stamps on to my background.


Next, I added some manuscript paper, a couple of stamps and a photo of my parents wedding.
I applied some white gesso over and around them with my fingers. Oh, and there is some stamping with a PA mini script stamp too!


I found a photo of my local and quite famous church....The Crooked Spire in Chesterfield and sketched and painted it! I used black sketching pens, a few watercolour crayons and some fresco paint. There is also a little highlighting with a white Uniball Siglo pen. 
My parents were married there in 1941 and my Dad was a soloist in the choir...but not on that day!
I painted a wash in the sky with PA fresco Sky, added some more touches of white gesso, a little scribbled framing, and , on the advice of Jo Myhill.....did a little writing around the photo!
My first skirmish with architecture! 
Enjoyed doing this and hope that you like it too!


Wednesday, 10 February 2016

Wax drippage

I have been fascinated for some time by wax techniques and except for one play, I have had beeswax sitting on my shelves for ages!
So, the new Paperartsy challenge being wax, and Lin Brown's fabulous post with trapped layers drove me to get out my melting pot again!
If I was a cautious soul, then I would have studied all the information on the PA blog and watched the videos.......but, as usual,I barged into the proverbial china shop and played! I did visit the PA blog, but scanned excitedly!
I began with a piece of corrugated card and glued a wonderful paper napkin down!

I brushed over a little wax in parts and stamped a couple of PA stamps and added some distress inks using the Wrinkle Free method!


I gradually built up some layers of wax and stamped and stencilled around the edges....you can see some scratching and inking too! The middle bird is much more subtle in colour than the lower one because he has layers of wax over him!


I added more wax layers and used a gold leaf pen to highlight some of the scratches and embedded some tiny beads into the wax.
I also made some deep scratches in the foreground to enhance the stamped grasses and finished with some drippage, which I created by dipping my brush into the molten beeswax and pressing onto the top of the card, allowing it to run down from the brush!

If I wasn't Mrs. Must Get It Done Yesterday....then I would have known not to use a small brush, and my layering would be much smoother! I did melt some of the lumpy bits with my heat gun after reading Lin's post, which helped!
So, here is the finished piece!


I got a real buzz from doing this, and I have been back to the PA blog and studied the experts techniques....so, in the words of Arnie....I'll be back! Beeswax smells amazing too!

Am entering this into the PA challenge!


Tuesday, 9 February 2016

Mini book doodling

At the beginning of the year, I embarked upon the Wanderlust Art Course. I am delighted with the inspiration from the classes even after 5 weeks and have already added new skills to my limited repertoire!
Beckah Krahula, demonstrated zentangle, and her work opened out into doodling and natural forms.
This mini book is my interpretation of her fabulous work.
Brusho background and doodling in black pen, enhanced with Inktense pencils, and white Uniball pen.
Some of my doodles are inspired by the great work of Angie Lewin!


I am entering this into the CountryView Crafts challenge blog about Backgrounds.