Wednesday, 11 June 2014

Washi collage

Long time no post, so here I go after health blips and a glorious holiday.
First of all thanks to Sara for fresh inspiration.

I adapted her ideas by using proper alcohol inks , brayering just the same and pressing  alcohol ink through a new stencil.
I don't have Sara's stamps….yet, but improvised with PA linear sentiment stamps and Ellen Vargo chevron stamp.
Everything else was more or less the same.
When I have another go I will match my colours to my flower more carefully.
Really enjoyed this, thanks Sara.

Saturday, 10 May 2014

Floral Pig

All the challenges on Paperartsy this week have been exciting but I was blown away by Lucy Edmunson's gorgeous Wooden house. So fresh, bright and just glorious. What a clever use of Grungepaste.

This one doesn't need much explanation, I just followed Lucy's clear instructions. I chose the pig because Lucy mentioned that this technique works on curves.
Fresco paints used:-

The only extras that I did were printing flowers onto tissue through a stencil for the feet and die cutting tissue leaves.


Lucy, your work is fabulous and you are so sweet, thank you for sharing your work with us. xx


Tuesday, 6 May 2014

Burned Tin

It was with great excitement that we welcomed our new Guest Designer, Liesbeth Fidder to Paperartsy.
Many of us who subscribe to Craftstamper are familiar with her work and great admirers also.
She did not disappoint with her Altered Sewing Tin. We were treated to three nights instalments and I have been beavering away for three nights also .

I started by (after many hilarious exchanges with some of the Patwits) burning my tin on a cooker flame. We do have an open fire but, as many of you know, being so impatient, I couldn't wait for the fire to be lit so I tackled it with coal tongs over the gas flame. It started out as plain silver and I was thrilled with the beautiful coppers, bronzes and even bluish tones that emerged. so much so, that I decided not to cover all of the front.
I started by stamping a lacy panel in Archival coffee and scrunching wax paper, ageing lace with Vintage Photo Distress ink and punching holes through the tin and adding Brads.
I made some small tags using LP stamps, aged them and added some Distress stickles. I secured them with string and another LP stamp. I also stamped a coin, put it into a bottle top and covered with Glossy accents. To finally get the balance right I added the word "Art".


Next, I cut a piece of cotton fabric and stamped my large LP stamp in Black Archival. I frayed the edges, painted it with watery distress ink and highlighted some of the images with coloured pencil crayons.
Next I played with Red Geranium, Olive and Coffee Archival and Surgical Spirit. I rubbed my double piece of white card into it on both sides and let it dry. Well, I didn't let it dry cos I am in too much of a hurry, I dried it. Then I began to build up a grid of stamping, sometimes using the first print and sometimes printing off on spare paper first to get a mixture of depths. I got really excited doing this and went with the courage of experimentation. Like Liesbeth, I go with the flow and vary rarely have a plan.I inked around the edges and added some PA words on Gold paper which I scribbled round. I also added a bit of old jewellery.
These two pages fold in half and sit inside the tin.
Finally, for the base of the tin I made a wax envelope to fit , stamped the base with the large LP stamp and then sat a piece of fabric onto it which was also stained and frayed. I have used another PA stamp for inside. So, when you lift up the card there is an envelope which opens and a message inside!
I love my tin and have enjoyed the process hugely. Thankyou Liesbeth, you are a very talented lady and its brilliant to be able to share your ideas.


Saturday, 3 May 2014

La Colmena

Hi everyone, soooo excited to be drawn out to be a 3 upper and extra excited cos I get to show on my birthday.
I chose to enter the draw for the new stamps HP1303EZ because I love the image of the face, very Grace Kelly and all the script and labels looked very inviting.

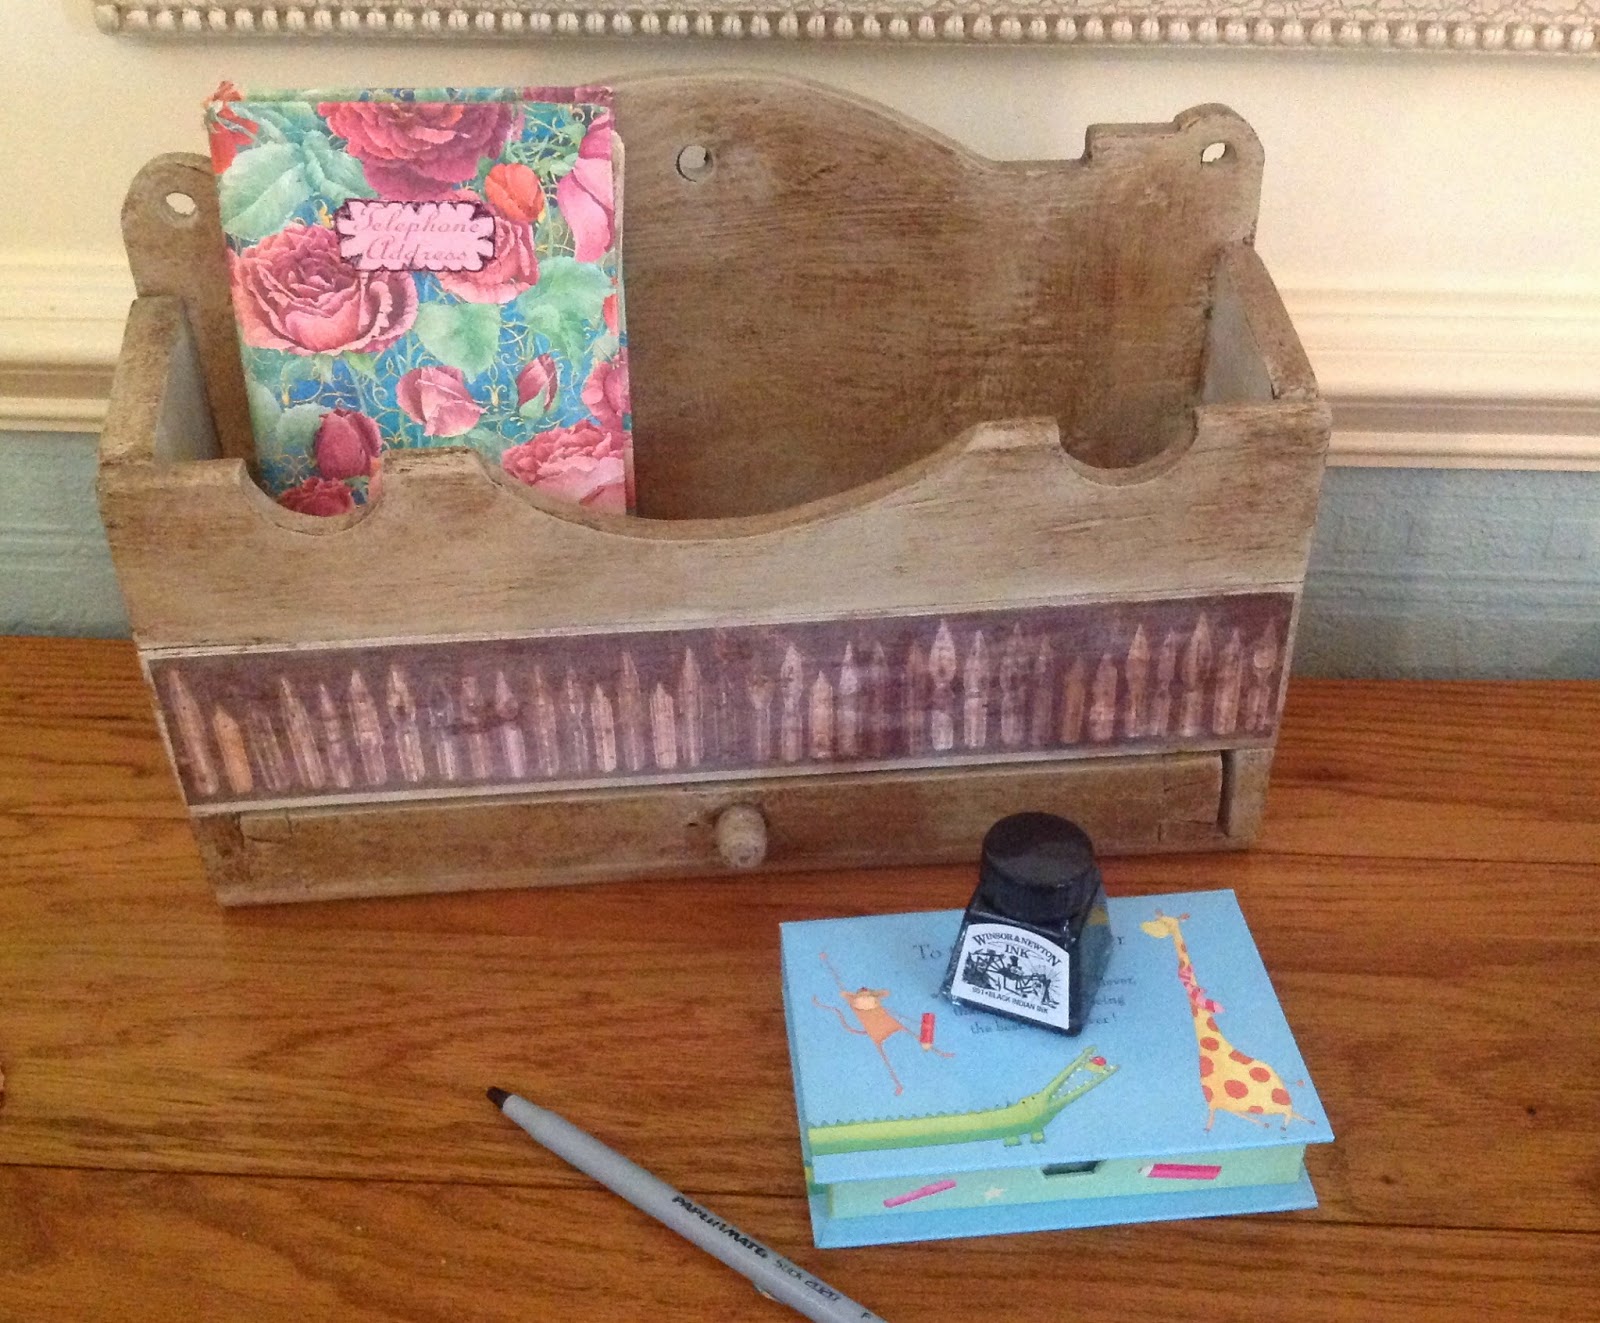
I decided to update all the stuff on my phone table, my address book looked very tired and there was a mismatched notebox and biros etc. The actual drawered box I bought at a flea market and it had already been tarted up with the old PA papers and waxed.
Incidentally, Leandra cracked up when typing my post as she thought that phone tables were so not now!
I started by turning my biro into a quill pen, making a feather as instructed by Julie Ann Lee out of manuscript paper, distress inked and rubbed with treasure gold. I emptied ink out of my bottle and made it look old by Grungepasting through a stencil, painting it with fresco French Roast and rubbing with Treasure Gold Aquamarine and Spanish Topaz.
Next I worked on my old address book. This was painted all over with French Roast, crackle glazed and painted over with Mushroom and Mermaid.I stamped assorted script in archival over the cover. I cut a corner pocket from Metal Card, wrote "Vins" on the reverse (back to front) by pressing onto the back of a mouse mat. I aged it with Treasure Gold Spanish Topaz and Oxynite. I created 3 "business cards" by using some of the stamps and tucked them into the pocket. I also TG the edges of the notebook.

I repeated the same Fresco paints onto my note box but didn't crackle glaze. I stamped half of the face of the girl and Grungepasted the same stencil as the ink bottle onto it to match. Inside I stamped the half face onto the notepaper and tied up with distressed lace. There is a "photo" of the girl in the lid also.
My large box was also painted in the same fresco paints, the paint went over the waxed surface no problem. I made a metal plate to fit over the drawer using the same technique with metal card and this time wrote "plumes" and "crayons". Going for a French feel!! I used assorted archival inks onto the stamps to give the effect of graffiti on the box. I created a postcard by using a selection of the stamps. To give extra drama I aged and stuffed some envelopes, wrote on them and tied them up with lace to sit inside the box.


My story for this is about an ageing French actress called "La Colmena", which is the name on one of the stamps. She is not coping with losing her looks and her career and clings to the past. This sounded good until I looked up "La Colmena" and discovered that it is not French but Spanish for beehive. Should have started with research not ended with it. 
Here is my creation in situ.
Special thanks to Leandra and all the Paperartsy team for giving me and the other 3uppers the opportunity to play nicely.xx

Thursday, 1 May 2014

3UP Chatsworth

I am loving "tuning in" to Paperartsy 3up challenges every night this week and being amazed at how inventive and creative everyone is with their resources.
I was particularly enthused by Jacqui's mini book and had never thought of using PA papers in this way.
Her video is fantastic and it fired me up to play.
So here is my front cover.
I started by cutting out heavy black card for a base and cut a piece of Chatsworth paper slightly smaller. I distressed the edges and grungepasted some script onto it. I rubbed Distress ink, bundled sage over the lettering and then rubbed Treasure Gold Aquamarine over the top. I used cut n dry foam to apply the TG which worked really well. Next, I cut out some of the Chatsworth leaves, rubbed on a little Treasure Brass and curved the leaves .
I die cut a border using more Chatsworth paper and cut a small panel on which I stamped Secret Garden.
I made some tickets with a Tim Holtz stamp and used a Prima flower.
I assembled it all and finished it off with a little brass owl, a brass corner and a few dots of green stickles.
This is all that I have managed so far but look forward to adding lots of pages with pockets etc and using it to display some photos of my garden.
Thankyou Paperartsy and the 3 uppers for a mind-blowing week of exciting ideas.

Sunday, 27 April 2014

Sam's Debut tag

Not blogged for while but when Sam came up as Guest Designer, my little friend who has helped me to build my blog and help me with crafting in general then I couldn't not have a go.

I love her tag and admire her style and the way that she plays with different materials and techniques. You can tell that she just loves to play.

I started with  size ten tag and brayered like Sam but using Chartreuse and Bora Bora. Then I stamped a background using LPC022 and used Cornflower blue Archival. Finishing off with white pen highlights like Sam.

Next I made a tag from corrugated card and brayered some Bora Bora onto it. Stamped and cut out 3 faces also from LPC022 and stamped some circle patterns from LPC024.
I coloured with red pen around the faces and on the cheek and cut them out . I was going to colour the eyes red to match mine but thought that it was going for the sympathy vote a bit too much.
I stamped onto crunchy wax paper, scrunched it and glued it to the tag.
A bit of arranging and gluing and  few threads and Hey Presto….Back on the circuit. Feel a bit wobbly but pleased to mark Sam's debut!!

Monday, 21 April 2014

Forces Letter 2

Having enjoyed playing so much I played again along the same theme.
I began as before by brayering neutral Fresco colours onto my page and this time added some Fresco Sky for added life!
I once again mixed neutral Fresco paint with Grungepaste and applied it with my palette knife, adding assorted mica flakes before it dried and a little Frantage aged Gold embossing powder.

I then built up my page with assorted wartime pages which were torn and distressed, another image of a girl with flowers, some lace and fabric. I chose  Lin Brown sentiment and stamped it onto manuscript paper. Finished it off with an anchor button to continue the forces story.
I got a lot of pleasure from this page and will progress to more of this theme.